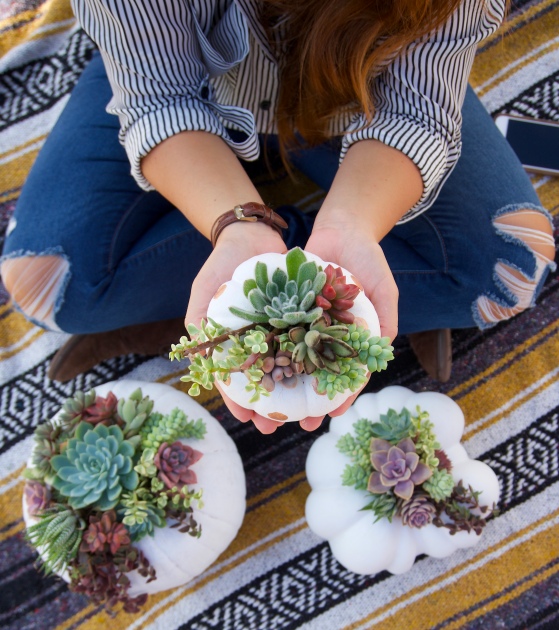
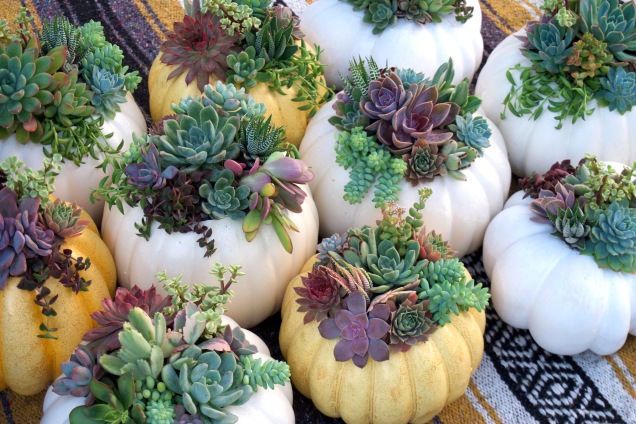
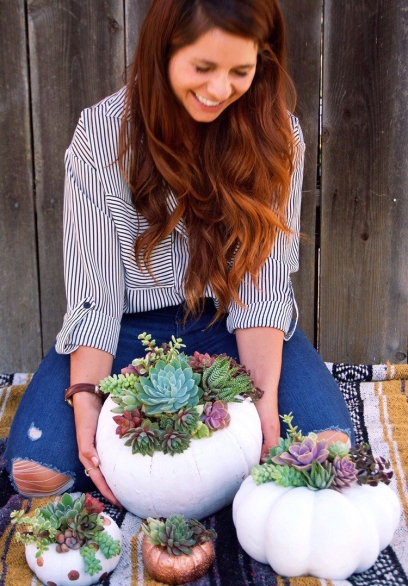
So by now you’ve probably seen the succulent-topped pumpkins everyone has been making…So, if you’re like me & aren’t a huge fan of traditional bright orange pumpkins or you just love things with a funky, unique vibe, this succy-pumpkin DIY is for you! & it’s honestly SO stinking simple & so CAYUTE!
As I was perusing Joann’s fabric the other day their Autumn seasonal fabrics had me heartstruck. I spotted 4 adorable flannel & fall-themed patterns, & I knew I had to figure out something fun to do with them. Then I looked over & saw a bag of faux mini pumpkins on sale & it hit me. Fabric-covered Succulent-topped pumpkins.
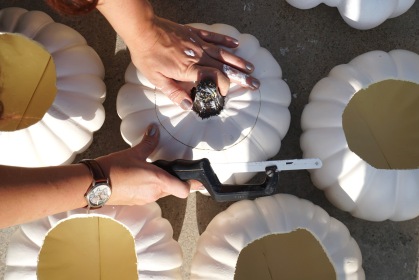
YOU ONLY NEED A FEW SUPPLIES
- Faux Pumpkins of any size or color!
- Fabric (quantity needed will depend on the size pumpkin you use. For large pumpkins you’ll need approx. 1/2yd, but for mini pumpkins like I show in this blog I used only 1/2 of a remnant square they had on sale!)
- Hot Glue & Gun (and/or Craft Glue for glueing the succulents)
- Moss
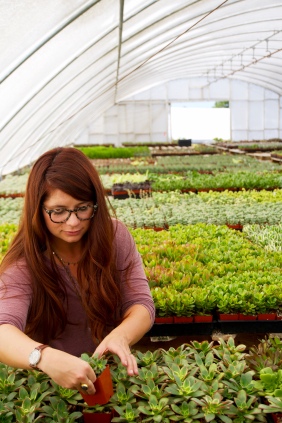
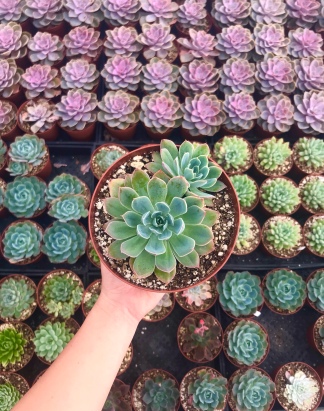
- Succulents
- Spray Adhesive
- Scissors
Now, Grab Your Favorite FALL Latte & Let’s Get Started!
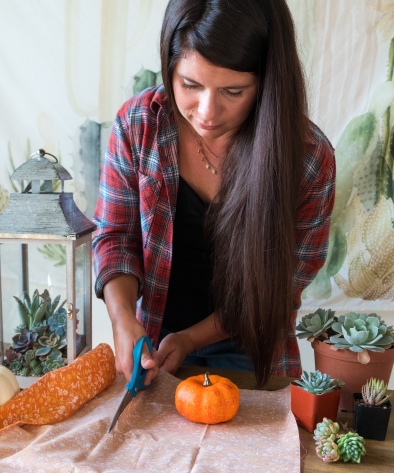
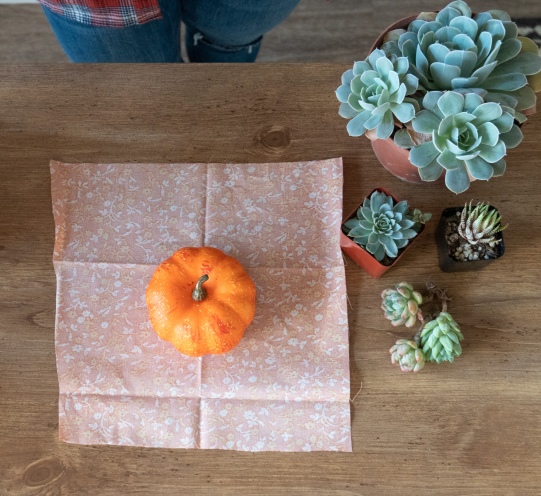
STEP ONE: Get your fabric & lay it flat on the table (iron before you begin if needed). Set the pumpkin down toward one of the corners of the fabric to conserve fabric, you’ll have a bit leftover. NEXT, Do a practice fold with fabric by bringing all corners of the fabric up toward the stem of the pumpkin, and adjust direction of pumpkin as needed to help you eyeball how large of a square you will want to cut.
NOW, Time to measure & CUT! This is the hardest part of the DIY honestly, and that’s not saying much because it’s still ridiculously easy lol I’ve found as a general rule of thumb, to wrap all the way around the pumpkin, you’re going to want your fabric to be about twice the length & height of your pumpkin. If you want to be super precise you can measure the bottom of your pumpkin and multiply it by 2 and maybe add an extra inch for good measure, this should make the fabric large enough & give a little wiggle room in case you make a wrong cut somewhere down the road. AFTER you’ve measured, cut out your square.


After you’ve cut your fabric square, place pumpkin in the center of square, and do another practice run scrunching your fabric up toward the stem, just to ensure it reaches all the way around!
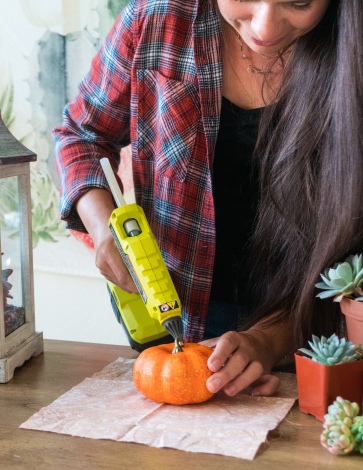 NEXT, Put a small dab of hot glue on the top of your pumpkin right next to the stem, and press the fabric into it. (Hack, if your hot glue gun gets ridiculously hot like mine, use a chopstick to press the fabric down into the glue so you don’t burn your fingers, or use heat protective gloves)


Work your way around the pumpkin chunk by chunk, doing this over and over. Bunching the fabric and glueing it to the top. Feel free to scrunch up the fabric as much or little as you like as you go, whatever look you prefer. The more you bunch the fabric together, the more it will actually look like it has those pumpkin creases in the sides.
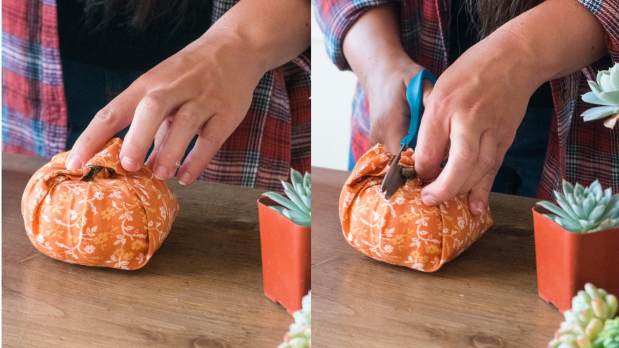
As you’re making your way around the pumpkin, feel free to trim the excess fabric at the top, around the stem as much as needed, your square may be a bit bigger than necessary. Also, keep in mind, what the top of the pumpkin looks like doesn’t really matter, since it will get covered up by succulents later.
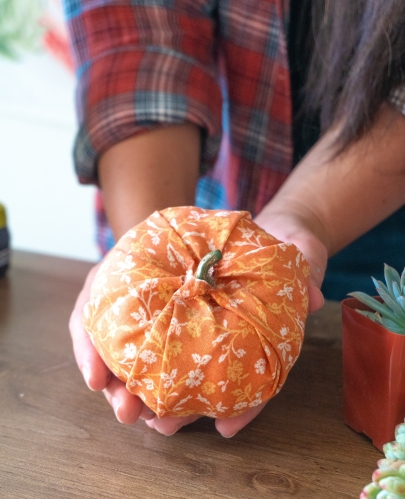
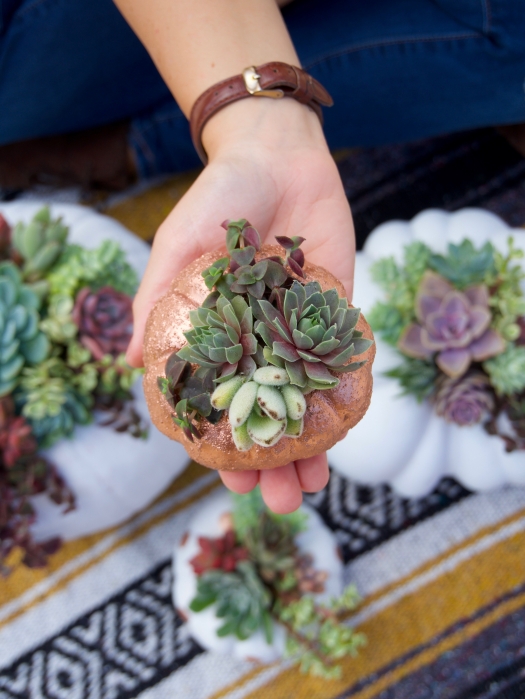
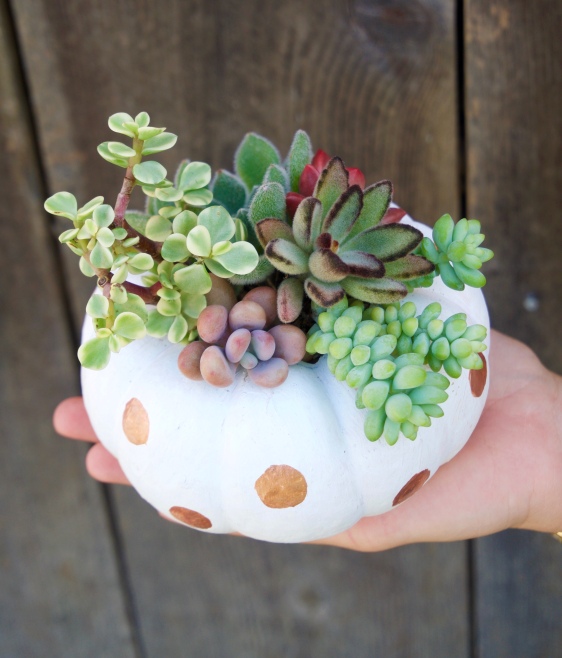
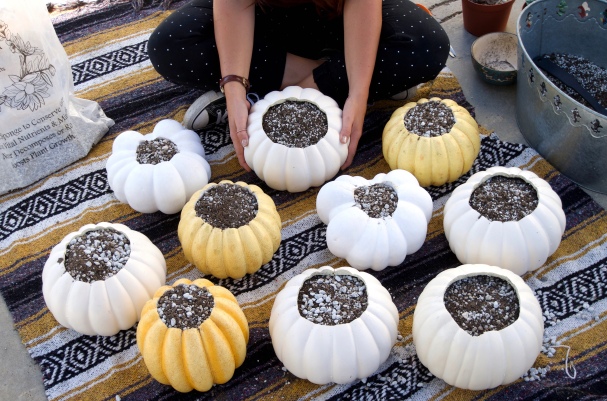
Once you’ve made it all the way around the pumpkin with your fabric & glue, and trimmed what needs to be trimmed, it’s time for the FUN PART! Succulent Time!
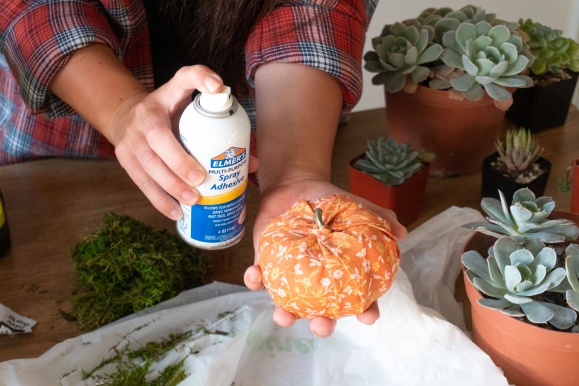
To prep the top of your pumpkin for the succulents, spray the adhesive around the entire top of pumpkin and stem, and press a thin layer of moss on top. This step is necessary because the moss will hold moisture to hydrate your succies when you water, without causing them to rot.
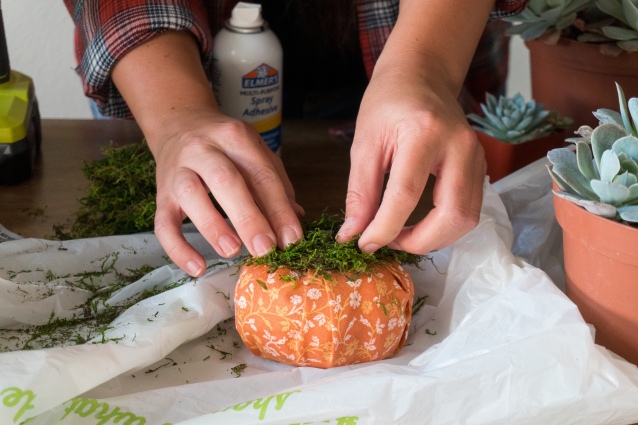
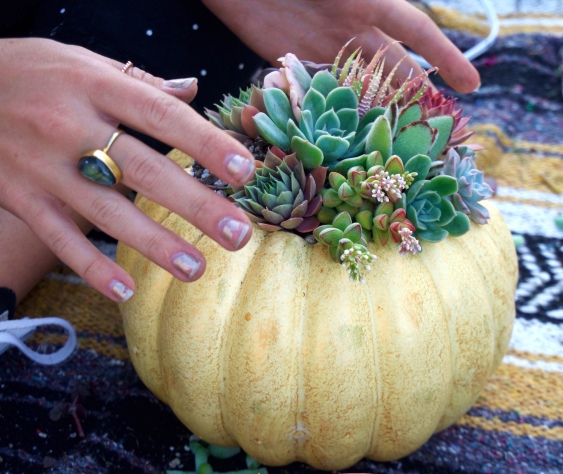
Once the moss is on, it’s succy time! I like to start by putting my favorite and somewhat largest succulent (or 2 off-centered succulents) in the middle and then building around it. Put a generous amount of hot glue either on the top of the moss where you’ll be placing the succulent, or put the dollop of hot glue on the bottom of the succulent, and press to the moss firmly and hold until completely cooled and hardened. (Note, you can also use craft glue for the glueing of the succies, whichever you’d prefer, I like hot glue because it dries instantly so I can build more quickly) PLEASE NOTE: Glueing the succulents, even with hot glue, will not kill them or damage them. I will talk at the end of the blog about how to dismantle your succies & what to do with them after Fall is over & pumpkin season is no more.


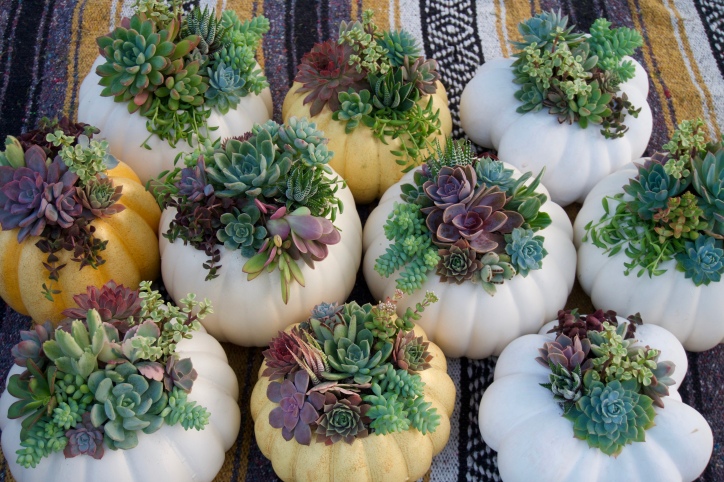
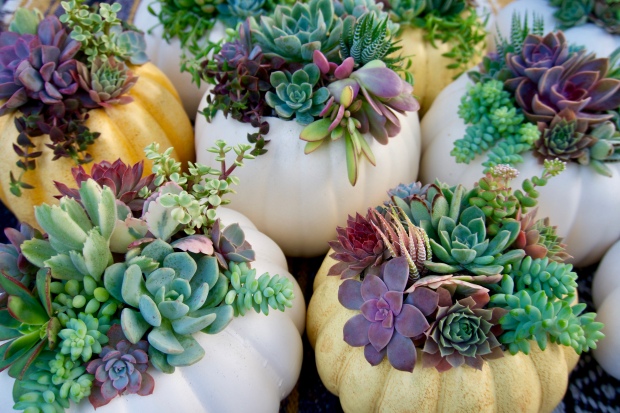
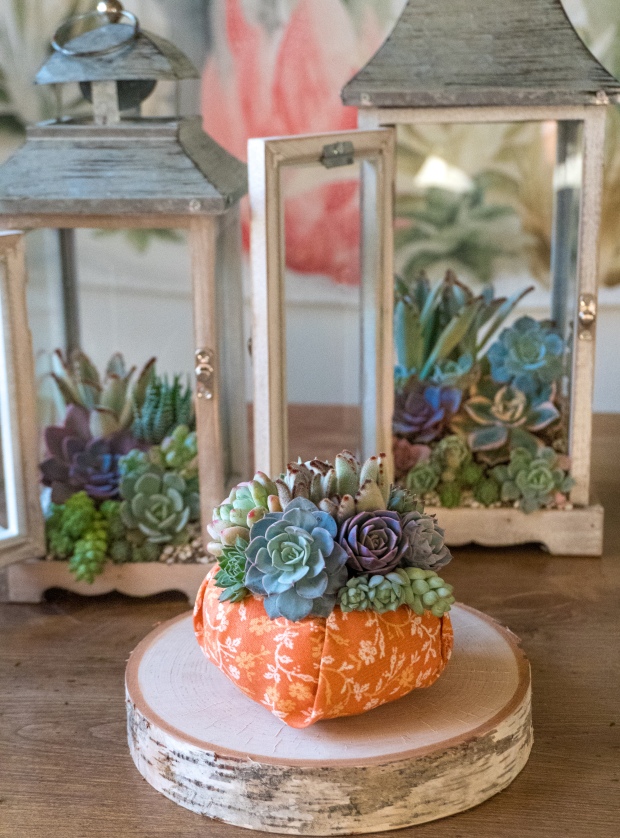
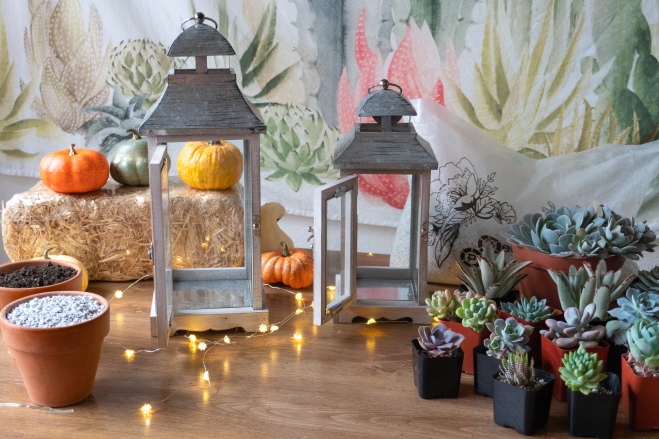
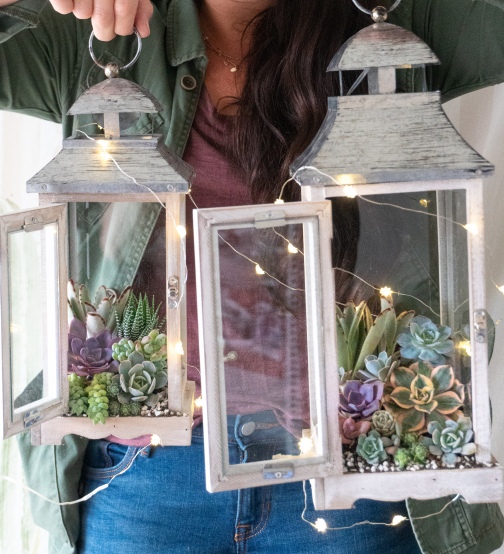
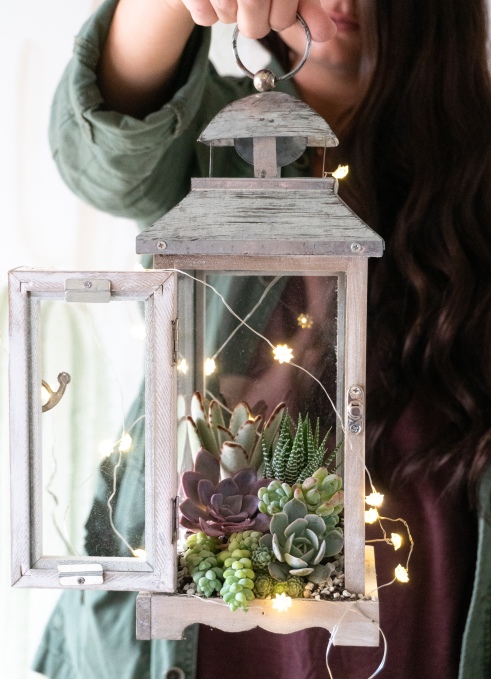
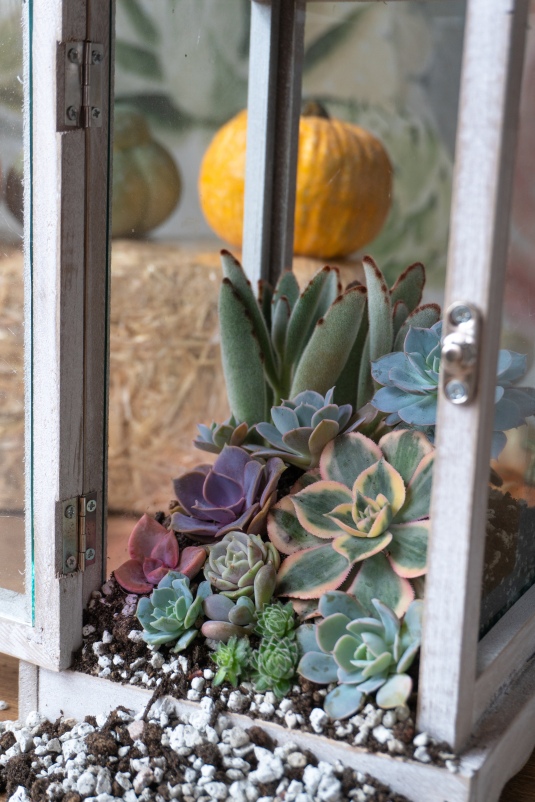
Keep doing this until you’ve covered the top of your pumpkin and feel like it’s exactly how you want it! I loveeeee how ours turned out, and it goes perfectly styled with the lanterns we made last week and our traditional succy-topped pumpkins, (DIY on how to make those to coming very soon).
AND VOILA’! You are now ready to get down with your Festive Fall Bad Self. I didn’t lie, that was ridiculously easy right? If you’re like me, you’ll want to make at least 5 of these cuties, plus they make AMAZING festive gifts, for house-warming or just to say I love you 🙂
QUICK NOTE on Maintaining these cuties! So in order to keep your succulents happy, try to keep your pumpkin somewhere they will get indirect bright light, not direct hot sunlight all day. Or if you plan to put them in a dark corner of a bookshelf or desk make sure they get some time in windowsill sun at least two times a week. Also, for watering, once a week or once every other week (depending on inside or outside & how hot the spot it is in will be) take a spray bottle and try to spritz a tiny bit of water around the roots of the succulents, into the moss. But not TOO much! The moss will soak up the water and keep the succy roots moist throughout the week. & That’s all!
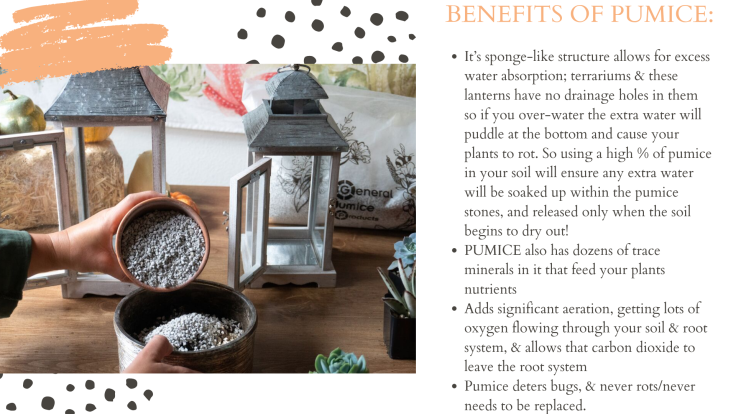
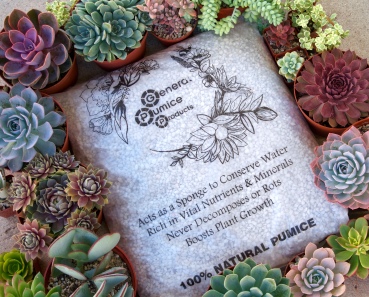
After the fall season ends, you can simply & easily dismantle your pumpkin whenever youd like. GENTLY wiggle & pull the succulents free from the moss, and peel any remaining hot glue off the roots and plant in a good draining soil mix of 50% PUMICE 50% soil, and they will continue to grow, unharmed!
That’s it! Hope you enjoyed this tutorial, and I hope to see your fabric pumpkins on the interwebs soon! ❤
Happy Fall Ya’ll!


 As you can see, you really don’t need a ton of supplies you probably don’t already have, so let’s get to it!
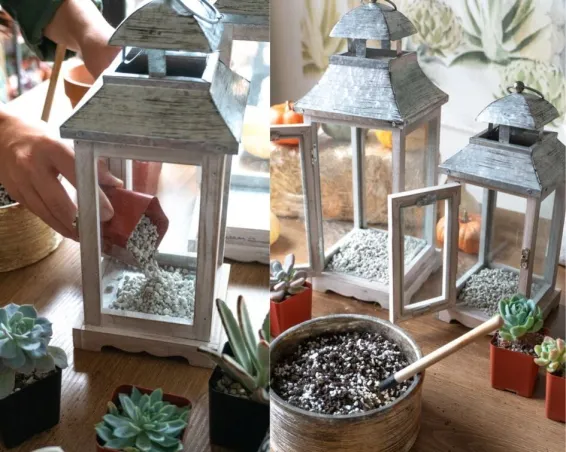
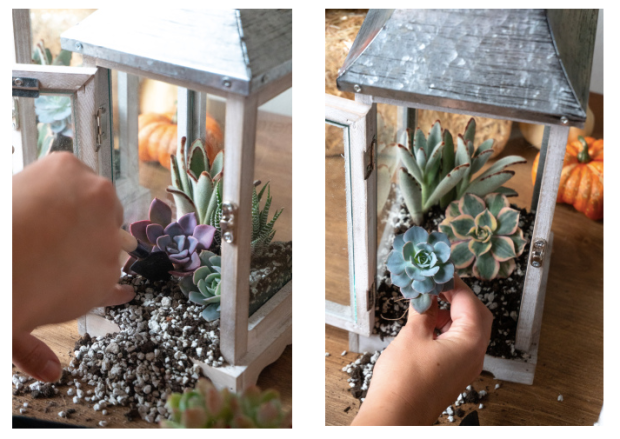


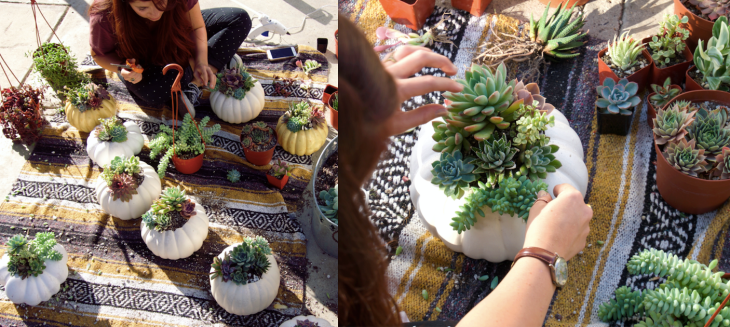
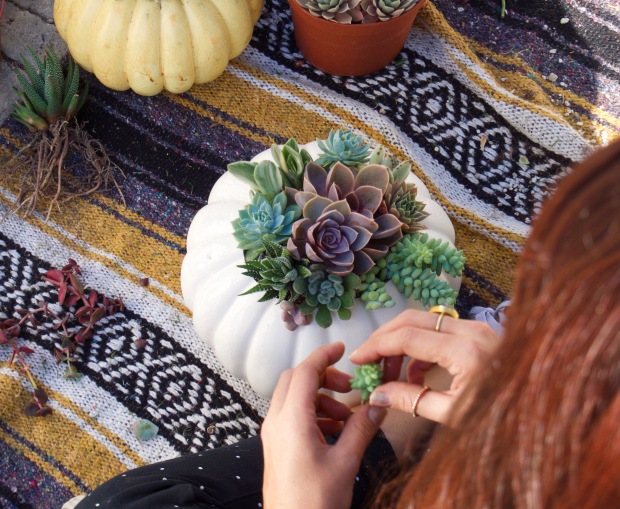
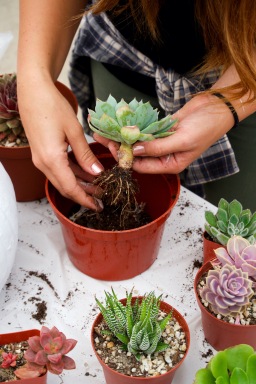 point of each centerpiece, you can much more easily envision the rest & build around that. Once you’ve made your thriller selections, it’s time to start planting. So, start by removing the root ball from each succulent, (as pictured to the right). Gently pull the succulent out of the container and massage as much soil off of the roots as possible, you always want to do this when planting because this allows you to loosen roots that may have clumped together while growing in the nursery pot, so the roots can breathe better.
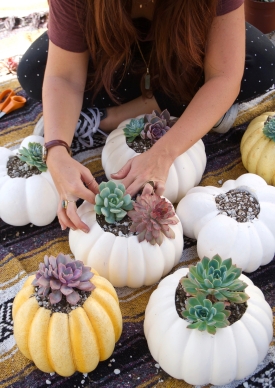 Always remember when planting a project like this the most important aspect of designing is HAVE FUN WITH IT! There is no science or blueprint to designing & planting a succulent container. Every single one is unique & the point of planting it in the first place is to enjoy yourself during the process & then enjoy the final product! The process is what makes it so beautiful & soul-soothing. So don’t stress out about placement, colors, patterns, or textures too much, don’t try to copy ones you’ve seen on instagram or Pinterest, build one that reflects YOU & your personality & style. Honestly just do whatever YOU like best & what combinations/colors tickle your fancy most!
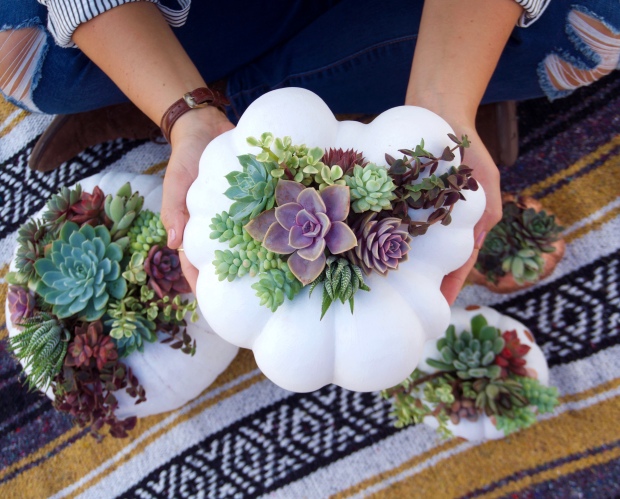